Nginx + Fail2Ban: A Simple Anti-Attack Setup
Nginx acts as a reverse proxy, which means it could monitor almost all inbound requests. And it can limit requests and delay or reject suspicious requests (you can define what counts as “suspicious” via configuration), and write events to its logs. However, Nginx itself cannot block attacking IPs at the system firewall level. Therefore, relying on Nginx alone is not enough to defend against attacks—you also need Fail2Ban.
Fail2ban is the opposite: it does not “stop” attacks by itself at the HTTP layer, but it can ban attacking IPs by reading Nginx logs. Its job is to continuously monitor Nginx log files and apply your rules to block suspicious IPs.
So, to use this combination, you first need to configure Nginx.
In the /etc/nginx/nginx.conf file, inside the http block, add:
limit_req_zone $binary_remote_addr zone=req_per_ip:10m rate=10r/s;
limit_req_zone $binary_remote_addr zone=req_sensitive:10m rate=2r/s;
limit_conn_zone $binary_remote_addr zone=conn_per_ip:10m;
These are three registries that limit requests per IP: one limits 10 requests/sec, another 2 requests/sec, and the last one limits the number of connections. 10m is the shared memory size. It can store roughly 16,000 IPs per 10 MB. For high-traffic websites, increase this value to avoid missing attackers.
Then, in /etc/nginx/sites-available/default, inside the server block, apply these registries:
limit_conn conn_per_ip 20;

location / {
    limit_req zone=req_per_ip burst=20;
}

location ~* ^/(login|admin|api/auth) {
    limit_req zone=req_sensitive burst=10;
}
Burst allows short-term request bursts above the rate limit. A very high burst may be exploited by attackers or accidentally block legitimate users. (Adjust limit_conn carefully if your site uses WebSocket or long-lived connections)
Next, set up Fail2Ban.
Create and edit the file: /etc/fail2ban/filter.d/nginx-limit.conf
[Definition]
failregex = .*limiting requests.*client: <ADDR>,
ignoreregex =
These filters define what patterns in Nginx logs count as “suspicious requests”, and they extract the client IP so Fail2ban can ban it.
Then, in /etc/fail2ban/jail.local, configure how to punish those captured IPs:
[nginx-limit]
enabled  = true
filter   = nginx-limit
backend  = polling
port     = http,https
action   = nftables[type=allports]
logpath  = /var/log/nginx/error.log
findtime = 10m
maxretry = 10
bantime  = 7200
bantime.increment = true
If an IP appears 10 times in error.log within 60 seconds, it will be banned for 2 hours. Fail2Ban also records this event in its own log.
Additionally, Fail2Ban also monitors its own log and apply a heavier penalty for repeat offenders:
[recidive]
enabled  = true
logpath  = /var/log/fail2ban.log
banaction = %(banaction_allports)s
findtime = 1d
maxretry = 3
bantime  = 30d
If an IP gets banned 3 times within 1 day (based on Fail2ban’s log records), it will be blocked on all ports for 30 days.
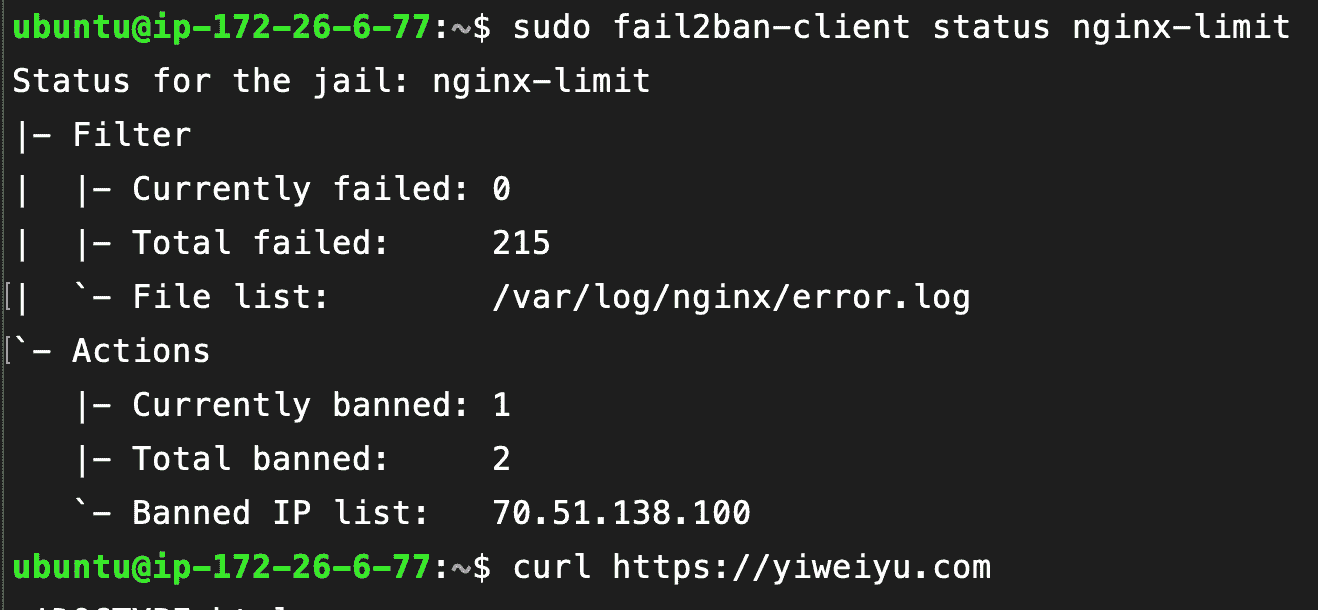
Finally, test whether your settings work.
Simulate high request rates to trigger Nginx limits and Fail2Ban bans:

This will ban your own IP if your configuration runs properly!
To unban yourself, log in via SSH through the Lightsail console and run:
sudo fail2ban-client unban --all